“
Our tech answered, was at our house in 30 minutes, and had it fixed within the hour. Smart, friendly, skilled.
AG
Anthony G.★★★★★ · Google

Garage door safety sensors (the photo-eyes near the floor) cause most won't-close problems.
Garage door safety sensors—the photo-eye pair mounted 4–6 inches off the floor on both sides of the door—are required by federal law on every opener made since 1993. They project an infrared beam across the opening; anything breaking that beam during a close cycle causes the door to reverse instantly. When misaligned, dirty, or blocked, the door won't close and the opener light blinks (10 times on most LiftMaster and Chamberlain units). The fix is usually a re-aim and lens cleaning—15–20 minutes on-site. In Kansas City, sensors drift from freeze-thaw bracket movement each winter, direct afternoon sun causes false failures in summer, and high July–August humidity invites spiders to build overnight webs across the beam. Garage Door Masters KC, based in Olathe, realigns and tests sensors same-day across the metro. We carry replacement sensors for most major makes, right on the truck. The $79 service call goes toward the work, and we verify the auto-reverse still meets UL 325 standards before leaving.
The door won't close, reverses on the way down, or the opener light blinks; one sensor LED is off or flickering.

We realign and clean the sensors, repair any wiring, and verify the door closes fully and still reverses when the photo-eye beam is blocked — the safety feature that protects kids and pets.
Our service call is $79 and goes toward the job if we do the work the same day — and the price we quote is the price you pay. A real local tech comes out, often the same day, with the common parts already on the truck.
Showed up on time. Was a pleasure to work with. Solved our problem quick.
Before you call us, run through this quick sequence — it takes about a minute, confirms whether the sensors are the real issue, and tells you exactly what to say when you describe the problem. Start by looking at the opener unit on the ceiling when you press the close button. On most LiftMaster and Chamberlain openers, the light will blink a specific number of times when a sensor issue is detected — a blocked or misaligned beam usually shows up as the opener light blinking (often ten times on LiftMaster and Chamberlain units), while a wiring fault can show a different count — the exact code varies by model. That blinking count is the opener's built-in diagnostic code. Count the flashes before anything else.
Next, look at both sensor LEDs. The photo-eye sensors are the small devices mounted about four to six inches off the floor on the vertical track brackets — one on each side of the door opening. On most LiftMaster and Chamberlain setups, the sending sensor (which emits the infrared beam) has a steady yellow or amber LED. The receiving sensor (which reads the beam) has a steady green LED when the beam is making a clean connection across the opening. If either LED is off, flickering, or flashing, the beam is interrupted or the sensor is misaligned. A solid green on the receiver is the confirmation you want — it means the beam is clean.
Now try the wall-button hold test. Press and hold the wall-mounted button inside the garage — not a press-and-release, but a sustained hold. Most openers allow the door to close when you do this, because the legal requirement is that the door must close when an adult is watching and actively pressing the button. If holding the button closes the door but pressing and releasing does not, you have confirmed that the beam is being interrupted during normal close mode. The sensor is detecting something — a misalignment, a cobweb, a sun glare angle, or a physical object near the floor.
If the wall button hold still does not close the door, or if the LED check showed a specific wiring-related flash code, the issue may be inside the wiring rather than the beam alignment. A persistent sensor fault even after you have confirmed nothing is physically in the path is a wiring problem until proven otherwise. Also check: is the door closing fine at some times of day and failing at others? A door that only won't close on sunny afternoons is almost certainly sun glare on the receiving lens — not a broken sensor — and we can fix it without replacing anything.
Garage door safety sensors exist because of a documented history of injuries and deaths — primarily involving children — caused by residential garage doors closing on people and objects before automatic reversal systems were standardized. In 1993, the U.S. Consumer Product Safety Commission and UL standards bodies mandated that all residential garage door openers sold in the United States must include a safety reversing system. Every opener installed in a residential garage since then — which is virtually every unit in service today — must have photo-eye sensors that prevent the door from completing a close cycle when the beam path is broken.
Here is how the system works mechanically. The sending sensor, mounted on one side of the door frame about four to six inches off the floor, emits a continuous narrow infrared beam across the full width of the door opening to the receiving sensor on the opposite side. The beam is invisible — infrared light is outside the visible spectrum — but its status is constant: either the receiving sensor detects the full beam and signals the opener that the path is clear, or it doesn't, and the opener treats that as an obstacle in the path and will not close.
The mounting height of four to six inches is intentional. That zone is where a small child or pet is most likely to be present in the door opening — low enough to be unseen from outside the garage while standing at the opener button, but within the sensor's sweep. When the door is in a close cycle and the beam is broken by anything — a child crawling, a pet walking through, a bag that was blown into the path — the opener stops immediately and reverses to full open. The light blinks to tell you why it stopped. This is the safety feature working correctly.
Sensors drift over time for a simple mechanical reason. The brackets that hold them are thin stamped steel, attached with a single screw to the vertical track. The track itself vibrates every time the door operates — and at two garage trips per day over ten years, that is more than 7,000 vibration events. Each tiny vibration moves the bracket a fraction of a millimeter. The cumulative effect of thousands of vibrations is a sensor that has rotated slightly out of alignment — not enough to cause the LED to go dark immediately, but enough that the signal is weakened and eventually the receiver loses the beam. Even a bump from a broom handle leaned against the side of the garage can complete the drift that months of vibration started.
Kansas City homeowners see sensor-related won't-close calls cluster at predictable times of year, and understanding the pattern helps you anticipate the problem before it strands you. The biggest summer surge in sensor calls — from roughly late June through September — comes in the late afternoon hours, typically between 4 and 7 p.m. when the western sun is at an angle that shines directly into the receiving photo-eye. This is one of the most common misdiagnosed problems we see across the KC metro: a homeowner whose door closes fine all morning and fails consistently every afternoon assumes the sensor is failing or the opener is breaking down. The actual cause is direct sunlight overwhelming the receiving sensor's optical element. The LED may look solid, but the sun's intensity is swamping the infrared signal from the sender. The fix is not a new sensor — it is adding a small shield to block the direct sun angle, or adjusting the bracket by a few degrees so the receiver faces slightly away from the western sky.
The freeze-thaw pattern from November through March creates a different sensor problem. Kansas City's winters are characterized by repeated cycles of sub-freezing temperatures followed by rapid warm-ups — sometimes a 40-degree temperature swing within 24 hours. Water from rain or snowmelt gets into the narrow gap between the sensor bracket and the track, freezes overnight, and as ice expands it shifts the bracket angle by a small but meaningful amount. After dozens of these freeze-thaw events over a winter, a sensor that was perfectly aligned in October may be two or three degrees off-axis by February. Two or three degrees sounds negligible, but the IR beam is narrow — a few degrees is enough for the receiver to lose signal completely when the temperature drops to the point where the ice is thickest.
Kansas City's summer humidity — routinely above 70 percent from June through August — creates a third sensor hazard that most homeowners never suspect: spiders. Orb-weaving spiders find the sheltered recess around a photo-eye sensor bracket to be an ideal web anchor point, and they work at night when the garage is quiet. A fresh web spun across the face of either lens overnight is enough to scatter the infrared beam and prevent the door from closing in the morning. This happens most often in late summer, when spider populations are at their seasonal peak. The fix is simply cleaning the lens with a dry cloth — but it is a fix you need to make every time, because the spider will often rebuild in the same spot unless the lens area is wiped regularly.
Spring and fall bring the physical-disturbance pattern. Seasonal garage reorganization — putting away lawn equipment in fall, pulling out bikes and garden tools in spring — means more traffic in and around the garage, and sensor brackets are at exactly the height where a wheelbarrow handle, a ladder leg, or the corner of a recycling bin sweeps through. Most of these bumps are minor enough that the sensor LED does not go dark immediately, which means the homeowner doesn't know the sensor was disturbed until the door fails to close the next morning. After any heavy garage reorganization session, it is worth doing a quick LED check to confirm both sensors still show solid indicators before you need the door in a hurry.
Not every sensor problem is an alignment or obstruction issue. A significant portion of the sensor calls we respond to in the KC metro are actually wiring faults — and wiring faults present with similar symptoms but require a different fix. The wiring that matters here is the two-conductor low-voltage wire that runs from each sensor along the wall and track up to the opener head unit. On a LiftMaster or Chamberlain opener, both photo-eye sensors share two terminals on the back of the opener head — the plain white wire from each sensor lands on one terminal, and the white-with-stripe wire from each lands on the other. If either of those connections is loose, corroded, or severed, the opener sees a permanently broken beam even though the sensors themselves are perfectly aligned.
The clearest sign of a wiring fault versus a beam fault is the LED behavior. If both sensor LEDs are solid — the sender is glowing yellow, the receiver is glowing green — but the door still won't close and the opener blinks its fault code, the beam is not the problem. The sensors are talking to each other fine. The problem is the signal getting from the receiving sensor back to the opener head. Check the wire connections at both the sensor and the opener terminal block. Look for a wire that has worked loose, a terminal screw that was only partially tightened, or a wire that has been kinked or pinched where it runs along the track.
In Kansas City's residential garages, the most common wiring damage comes from two sources: vehicle impact and rodents. A car bumper or a bicycle handle that clips the sensor can also pull the wire at the connection point, causing an intermittent connection that fails when there is any tension on the wire. Rodents — mice and squirrels — are drawn to the low-voltage wire insulation and will chew through it, particularly in unheated garages in fall and winter when they are seeking shelter. A chewed wire is often invisible from a distance because the damage can be a few feet up from the sensor where the wire runs along the back of the track. We always inspect the full wire run from sensor to opener head on any sensor call where alignment and cleaning did not immediately restore function.
Corrosion is a slower wiring problem that builds over years. The sensor terminals on older opener units — particularly units from the early 2000s — use a simple screw-clamp terminal block that is exposed to the garage atmosphere. In KC's humid summers, the bare copper wire strands at the terminal connection oxidize progressively. The connection looks intact, but the oxide layer adds resistance that weakens the signal below the threshold the opener needs to confirm the beam is clear. Cleaning or re-terminating the connection at the opener head — stripping a half-inch of fresh wire and re-clamping it under the screw — often restores function instantly on an older unit with a corroded terminal. We carry replacement sensor wire on the truck for any job that requires a full wire replacement.
When you call Garage Door Masters KC at (913) 731-0190, a real person answers — not a call center or an answering service. We will ask you a few specific questions: does the opener light blink when you try to close, are both sensor LEDs lit, and does it happen at a specific time of day. Those three questions usually narrow the cause to one of three things — alignment, obstruction or sun glare, or wiring — and they let the tech come prepared for the most likely fix. If the timing of the problem suggests sun glare, we will confirm whether afternoon sun is reaching the west-facing sensor before dispatching, so the tech knows to bring a sun shield.
The tech calls you 10 to 30 minutes before arrival and texts if unable to reach you by phone. On-site, the diagnostic starts at the sensors, not at the opener — we check LED status first, then do a beam interruption test by passing a hand in front of each sensor, then check the wire run visually from bracket to opener head. This diagnostic takes about five minutes and almost always identifies the cause. If the problem is alignment, we loosen the sensor bracket, adjust the angle until the LED goes from flickering to solid, retighten, and confirm both LEDs are steady. We then clean both lenses with a dry cloth to remove any film or debris.
If the issue is a sun-angle problem specific to KC's afternoon exposure, we add a small hood or shield to the face of the receiving sensor — a simple stamped aluminum piece that shades the lens from direct overhead or side-angle sunlight while leaving the low-level beam path clear. This eliminates the afternoon failure permanently without any change to the sensor position or wiring. If a sensor bracket is bent or the sensor housing is cracked from a physical impact, we carry replacement sensors for most major makes, right on the truck.

Before we leave, we run the door through three full close cycles to verify it: once with the garage in normal ambient light, once with the area near the sensors in shadow, and once with a hand briefly interrupting the beam mid-cycle to confirm the auto-reverse engages correctly. The door should stop and fully reverse when the beam is broken during a close cycle — this is the safety function the 1993 regulation requires, and we confirm it is working correctly on every sensor call, not just the issue we were called for. The $79 service call goes toward the repair if we do the work the same day, so it is not an added charge on top of the sensor work. Most sensor realignments are the only charge for the visit. A sensor replacement or wiring repair adds parts cost that we quote on-site before any work starts.
Not sure? Tap what your door is doing in the tool below and we'll tell you the likely cause in plain language — or just call (913) 731-0190 and a real person will sort it out.
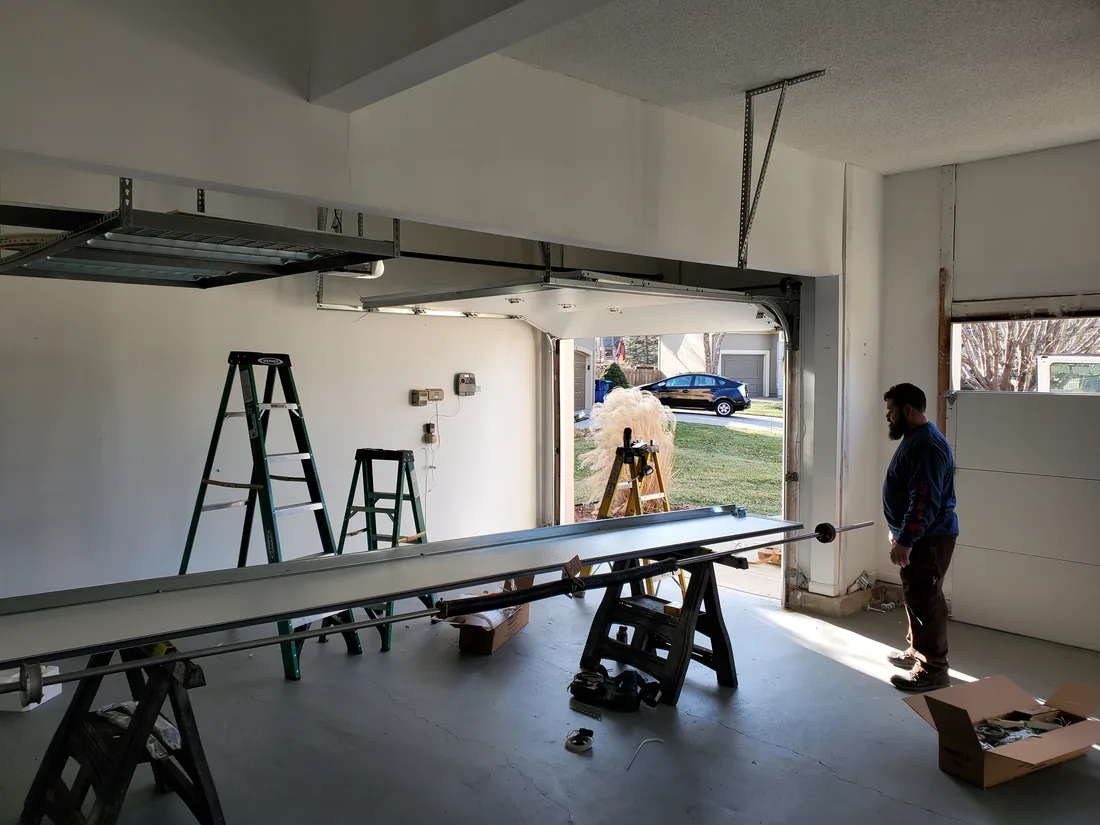
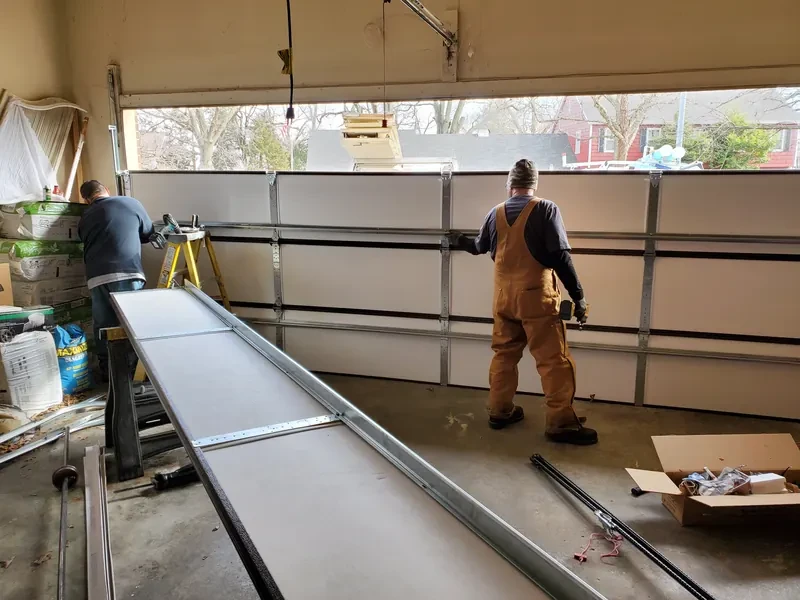
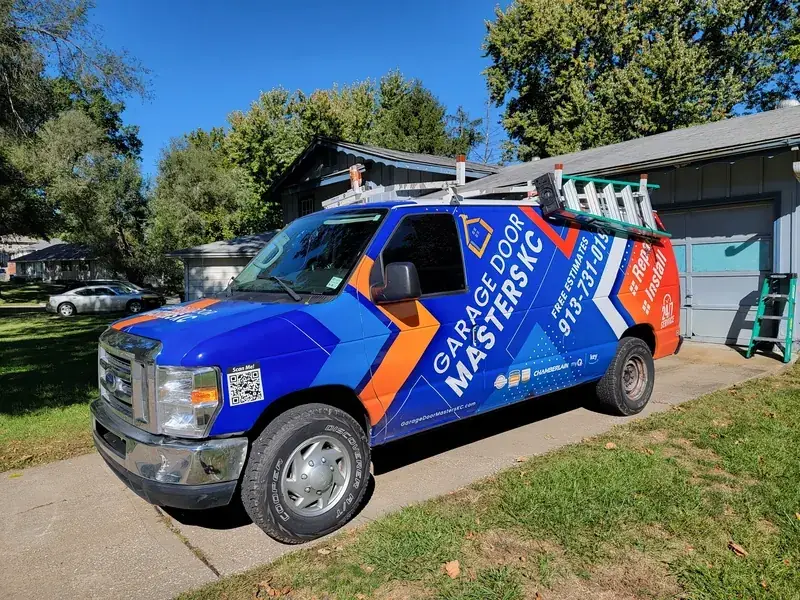
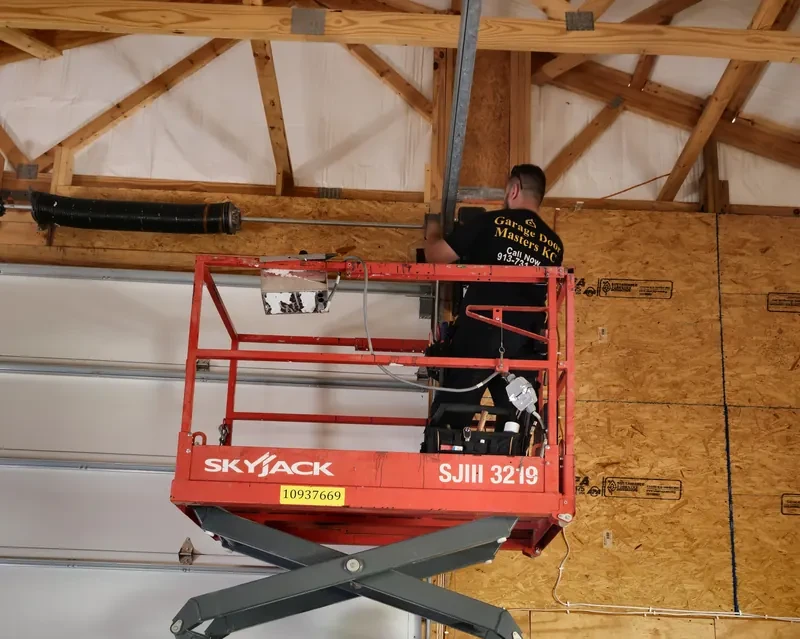
Our own crew and trucks — jobs across the Kansas City metro.
Tap what’s happening — we’ll tell you what it usually is, in plain language, and how fast we can be out. No robots, no runaround.
Not sure? That’s fine — call (913) 731-0190 and a real person will sort it out, 7 days a week.
Every review above is a real, attributed Google review — no filtering, no incentives, no paraphrasing. Read all 490+ reviews and how we verify them →
Our tech answered, was at our house in 30 minutes, and had it fixed within the hour. Smart, friendly, skilled.
On time and always professional. Definitely recommend.
I was very pleased with the work done and the expertise displayed by our technician. He was punctual and professional.
Our tech was excellent! Came out on short notice on a Sunday. Five stars, and would wholeheartedly recommend to anyone looking for garage door repair or replacement.
The team at Garage Door Masters KC was professional and efficient. Highly recommend their services!
Thanks for making the drive to our place and attending to our needs so quickly and efficiently!
Showed up on time. Was a pleasure to work with. Solved our problem quick.
Very timely service. Highly professional work by our technician. Don’t forget to do your annual maintenance!
A real person answers, 7 days a week — same-day service across the KC metro.
Booking calendar loading — or call/text us now (a real person answers, 7 days):
Or call (913) 731-0190Or text usReal-time online booking. Prefer to talk? Call or text (913) 731-0190 — a real person answers, 7 days a week.
Type to search every page — try a city, a problem, or a part.